Hello and welcome, friends!
This week on the blog is all about beginnings.
For me, starting is the hardest part of any project. Taking an embroidery piece from my brain, to paper, to fabric, to a final product can be so intimidating. But, I always know having a tangible product once I’m done will feel so worth it. What can I say? There’s just something about holding a physical representation of your labor that is so satisfying. Perhaps this is why we created trophies?? That’s a thought for another time.
Today, I am going to help get you started. That all begins with our materials.
Here’s my base recipe for any embroidery project:
- Embroidery hoop
- Fabric
- Needles
- Embroidery floss (varied colors)
- Scissors
- Pen or pencil
With these supplies, you will be able to create pretty much anything your heart desires.
Embroidery Hoops
Historically, embroidery hoops have simply been a tool to hold the fabric you’re working with taut so that you can stitch more easily. In modern embroidery, hoops are not merely a tool, but the frame for your project. Of course, the decision of keeping your work in an embroidery hoop is entirely up to you. But, it does keep your projects looking neat and tidy and takes away the headache of having to reframe it. We’ll talk more about “finishing” your hoops in another blog.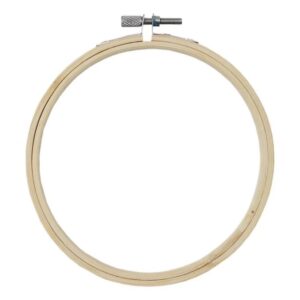
Hoops also come in many materials–wood, plastic, bamboo. Personally, I recommend using a bamboo embroidery hoop. This material is flexible and sturdy without losing quality.
When choosing a hoop, you must think about the size and shape of your project. Hoops are measured in diameter and come in all sizes, ranging from as small as 3-inches to upwards of 12-inches. My three most commonly used sizes are 5-inch, 8-inch, and 10-inch hoops. I like to keep several of each size on hand for my projects. Hoops also come in other shapes like ovals and rectangles. These hoops can be useful when working with a design that would not easily fit within the circular radius of traditional hoops.
Fabric
When it comes to selecting your fabric, the options really are endless. What you will find is that some materials are easier to work with than others. For example, denim is a thicker, stiffer fabric compared to thinner materials, like linen, and it can be challenging to get a needle through it.
It’s important to keep in mind that the type of embroidery I complete is not cross-stitch or needlepoint (although, I love and admire that style). Therefore, you will want to avoid cross-stitch fabrics that have a looser, more “open” weave. Look for fabrics that have a tighter, more seamless weave to them.
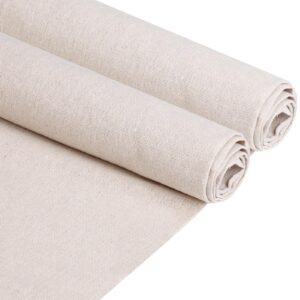
My personal recommendation would be to stick with linen or cotton, without too much stretch to it. You want the fabric to be manageable, but still have the ability to maintain its shape. When stretched in your embroidery hoop correctly, your fabric should have the tension of a drum head when tapped. Materials that are too stretchy or thin won’t do this and will be more challenging to manage.
You can find small bolts of fabric at craft stores, which is great for stocking up on one type of fabric. I also like to purchase quilting fat quarters to get fun colors and patterns. It’s less of an investment and I can generally get 2-3 projects out of one quarter.
I would also encourage you to thrift or repurpose fabrics that you might already have. You often find more unique materials and it’s more sustainable!
Needles
Arguably the most important tool used for embroidery, selecting the correct needle will really set you up for success. Needles come in all shapes and sizes, and are used for different purposes. Using a needle with a shaft that is too thick will punch a hole through your fabric that is wider than your embroidery floss and can cause the stitches to loosen. On the other hand, using a needle that is too fine can easily break mid-stitch–and we don’t want that!
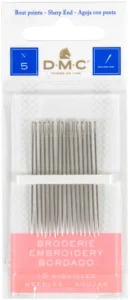
I’ve found that DMC size 5 embroidery needles work well for most projects. It’s a good size, is sturdy enough not to snap, and the eye is large enough that it makes threading the needle manageable. It’s the perfect needle to accommodate 3-4 strands of embroidery floss at a time.
For finer detail work, I like to use a DMC size 9 embroidery needle. The shaft is narrower, which allows for more delicate work to be done. This should be used on thinner fabrics, and it is the perfect size to work with a single strand of embroidery floss at a time.
Tip: The shaft of the needle should be about as thick as the embroidery floss you’re working with. This will allow the floss to pass through the fabric easily, and will prevent knotting.
Embroidery Floss
Also known as “thread,” embroidery floss is what really brings your creations to life!
This is different than the type of thread you would use for sewing garments. Embroidery floss consists of six-strands of cotton thread that are wound together. The great thing about it is you can pull apart the floss to get a precise number of strands for your project. Just like how adjusting the pressure you apply when drawing can alter the weight of a line, adjusting the amount of strands used for your project can alter the weight of your stitches. More strands used at once = thicker lines and faster coverage. For most projects, I use 2-3 strands at a time. This allows me to cover more ground, while still maintaining the detail of my design.
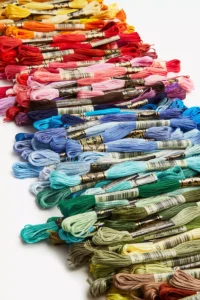
I highly, highly, highly recommend that you use DMC embroidery floss. It’s a tried and true: colorfast (i.e., it will not bleed if you wash it), fade resistant, and it comes in so many beautiful colors. Speaking from experience, skimping out on your embroidery floss will only make your stitching more difficult. I’ve had cheap thread ruin a project because it gets knotted or bleeds into the fabric when I wash it. I don’t want that to be you! The quality of DMC embroidery floss is truly unmatched and did I mention just how many colors? See for yourself.
Extra: Pearl Cotton
For some projects, I like to outline my work with pearl cotton. This is a single strand of cotton that does not separate the way embroidery floss does, but it is very effective for outlining work. This is completely a stylistic choice, and is by no means necessary. However, it can really make certain pieces pop, especially if there are details you’d like to highlight.
Scissors
While this may feel self-explanatory, I do want to touch on the importance of scissors. Specifically, the importance of using the right scissors. Personally, embroidery scissors are one of my favorite things to collect! They’re tiny and cute, but also essential to the success of your projects–what’s not to love?
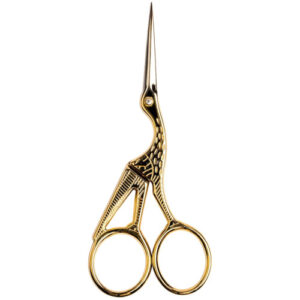
I’d recommend getting yourself a pair of embroidery scissors for your projects. Why? Embroidery scissors are small and sharp which makes them travel-friendly, easily concealable, and they can be maneuvered to accurately cut away at your embroidery floss. This will help with precision when working on your projects. The SINGER gold stork embroidery scissors are iconic–you may recognize them in WG at Home’s logo!
Tip: To ensure they stay sharp, dedicate these scissors just to embroidery.
Transfer Tools
While there are many methods for transferring your designs onto fabric, there are some tried and true ways that make it easy.
An old standard for transferring your designs: the pencil. Using a soft, fine point pencil will work best. Surprisingly, golf pencils work really well and they’re small, which makes them travel-friendly. You will cover any marks you make completely with your stitches, as they will not come off the fabric. Pens also work for this, but tend to be darker and can sometimes bleed if there’s too much ink. Pencils are softer and do not have the risk of bleeding. 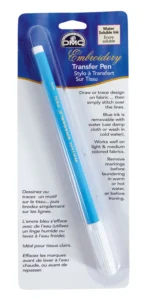
Another great tool is a transfer pen/pencil. There are water soluble markers which are non-permanent pens that are great for transferring onto light-colored fabric. The ink from these pens can be washed away with a damp cloth or cold water. For darker fabrics, chalk pencils are a great method. The marks can easily be removed by rubbing.
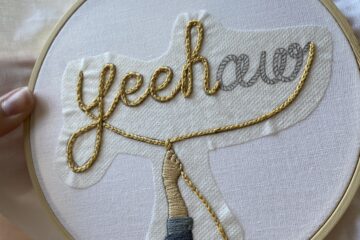
My most recent transfer method of choice has been water-soluble transfer paper. This is an adhesive paper that can be printed or drawn on. You cut out your design, stick it to your fabric, stitch over it, and then gently wash away any excess with water. The benefits: easy transfer method, more precise design, and acts as a stabilizer for your fabric. The challenge is that you need to wash your design with water, which comes with its own issues.
For beginners–I highly recommend using a pencil or transfer pen.
Once you’ve gathered all these materials, you are ready to begin your embroidery project! YAY!
We’ll be diving into more set up with these materials as we go on, but for now, work on getting your hands on them.
Need some more help? Don’t hesitate to fill out an instruction support form or comment below. You never know if someone might have the same question!
0 Comments