Hi, friends!
It’s officially spring! In celebration, I am going to introduce you to some of my favorite stitches that I use for creating floral designs. There are so many ways to create flowers in embroidery, but one of my favorite techniques to add some extra texture and dimension to a piece is to use the woven or wagon wheel stitch.
What is this stitch?
The woven or wagon wheel stitch gets its name from the use of five spokes that you weave thread through to build your flower. In my opinion, this stitch does a great job of emulating the look of a rose or a ranunculus flower. It combines the use of a straight stitch (for the spokes) and the weaving of thread over and under and around the spokes.
How to Get Started
Prep your hoop using my Getting Started method. Ensure that there is good tension with your fabric. Maintaining a taut foundation of the fabric will make completing this stitch much easier.
Before you begin stitching, I like to draw a circle on my fabric for how big I want the radius of my flower to be. I will then add five lines, making up the base shape of a star. These lines will act as my guides as I create my flower.
Once you have your hoop ready and design set, cut about an arm’s length of six-strand embroidery floss and thread it through your needle. You can separate your thread if you’d like, but for this stitch, you can use all six strands at once. The more strands you use at once, the faster this process will go.
Completing the Woven/Wagon Wheel Stitch
To begin, bring your needle up through the back, center of the star shape that you outlined on the fabric. Using a straight stitch, bring your needle up and down through the fabric to create five straight lines that will act as the spokes for your wheel. Pay special attention to ensure that these stitches are evenly spaced and about the same length. This will help when weaving.

- With your spokes in place, bring your needle up through the back of the fabric close to the center of your star.
- Weaving your needle over the first spoke, and then under the next spoke, repeating the process until you’ve come back to the spoke you started at. Pull your thread tight as you weave, pushing your work toward the center of the wheel.
- Continue this process of weaving over and under around the wheel until you’ve completely filled in your flower and you can no longer see the individual spokes.
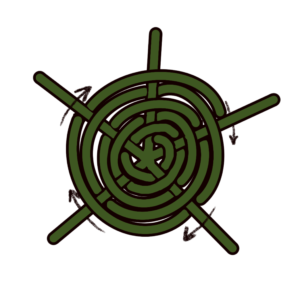
- If you run out of thread before you’ve finished filling in the spokes, simply bring your needle back down into your fabric, trim your thread, and tie off your thread. Then, rethread your needle and bring it back up through your fabric right near where you tied off your thread. Continue weaving as you did before. You can repeat this process as needed to completely fill in your flower.
- When you’ve finished with your flower, bring your needle down through your fabric, trim the thread, and tie it off.
Tip: When weaving, be mindful that you’re not snagging your spokes with your needle. This can cause them to separate or you may accidentally bring your thread through your spoke rather than over or under them. This can cause knotting so, be sure to avoid it!
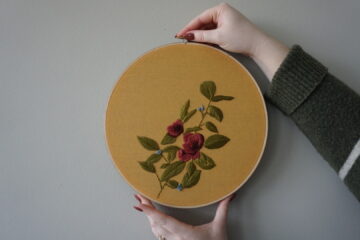
For a final touch, I like to add some leaves around my woven wheel stitches. You can do so by following my Leaf Stitch instructions. This will create the full flower-effect and will really bring your design to life!
Happy Stitching!
0 Comments