Hi, friends! Today, we’re talking all things practical embroidery!!
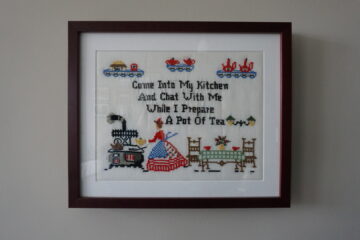
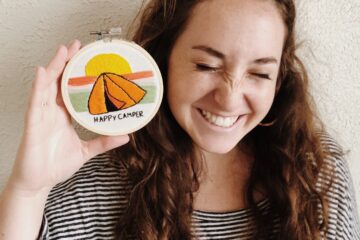
You may have read in my most recent blog post Reclaiming the Needle, that embroidery was historically used as a way to embellish and decorate clothing, fabric, decor, and so much more. It wasn’t really until the 17th century that needlework was something framed and displayed instead of applied practically to everyday items. We have been stitching and framing embroidery pieces for centuries now. Especially in recent years where the trend of keeping your piece in its embroidery hoop has really pulled focus.
It makes sense to me why it’s appealing to keep your work framed in an embroidery hoop. It holds your fabric taut, keeping your design tidy and intact. It takes away the complication of having to restretch your fabric to frame it in a traditional frame. It simplifies a lot (which is why I love this method).
But, using embroidery in a practical, useful way, is how it was originally intended! If you’re taking the time to learn these skills, why not apply it to things you see and use everyday? Here are some ideas for how to use embroidery to decorate your life!
Make a mark on your clothes!
Whether it’s on a shirt, denim, a hat or even canvas sneakers–embroidery can add a little something extra to your wardrobe.
- Anytime you’re embroidering on something that might get washed, but sure to use colorfast embroidery thread. This will prevent the color of the thread from bleeding and staining your clothes!
- Clothing can be thicker and have more resistance than just a single sheet of fabric so, be prepared and use a strong needle (size 5 is recommended) so that it doesn’t snap when stitching.
- Use a stabilizer to hold your fabric in place and prevent puckering. A water soluble stabilizer is a great option and many brands allow you to print your design directly onto the paper. So, this creates an easy way for you to transfer design onto clothes.
Create your own patch!
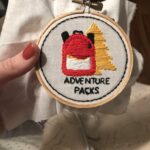
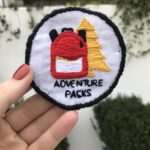
It’s easier than you might think to make your own patch that can later be sewn onto hats, bags, jackets–anything you want!
- First, complete your embroidered design on cotton fabric. It’s recommended that you use shorter, tighter stitches for your design as longer stitches have the potential to sag when taken out of the hoop.
- Next, take your completed design out of the hoop and cut out the design into your desired shape. Ensure that there is about a ¼ inch of allowance around the design from where you’re cutting.
- Then, take your design and lay it on top of a piece of felt material. Use a pin (or several) to secure it in place. Cut the felt to match the shape of your design.
- Lastly, use a satin stitch to join the edges and secure the embroidery design and the felt to each other. Continue around the entire perimeter until the entire design is laid flat and you’re left with a felt embroidery patch. Remove any pins.
Add your monogram for a personal touch!
One of the most iconic uses for embroidery, monogramming is a great way to add a classy, personal touch to anything. Clothes, totes, ties, scarves, pillows, handkerchiefs–you name it!
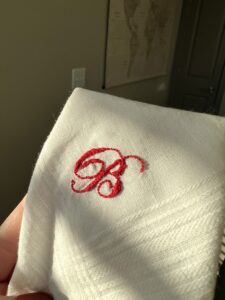
- I highly recommend using the satin stitch for monogramming, especially for thicker, filled lettering. You can learn how to complete a satin stitch from my tutorial [insert link]
- You can also use the back stitch for finer line work that a satin stitch wouldn’t work for.
- If you want the monogram to have a “lifted” effect, you can outline the shape with a back stitch first and then apply a satin stitch over it. This will create a raised look and feel.
- Depending on what you’re monogramming, using a stabilizer can help prevent puckering of the fabric and can be how you transfer your design.
Use felt to create some beautiful gifts!
A fun way to apply embroidery is for making gifts that you can share with family and friends. A favorite material of mine to create gifts with is felt! It is so versatile and provides a structure that regular cotton fabric does not. You can use your embroidery skills on this material to create some beautiful gifts!
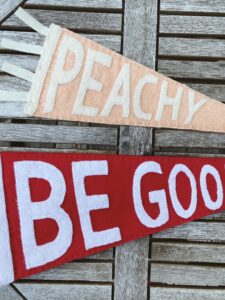
Here are some ideas to get you started:
- Felt ornaments. I like to use embroidery to add designs to the felt, and running a blanket stitch around the perimeter can make it look finished and tidy (see image).
- Pennant flags. I used a back stitch to secure the letters in place and attach a backing to the flag to hide the stitches.
- Birthday crowns for children (or for the kids-at-heart).
No matter how you use embroidery, it’s supposed to be fun! Give these ideas a try today.



2 Comments
Ellie · March 14, 2024 at 11:40 am
I love practical crafting! I’ve never thought to use a fabric stabilizer for embroidery on clothing, that definitely would have made my life easier for past projects!
sarahccullen · March 14, 2024 at 8:25 pm
Hi, Ellie! Yes, stabilizer makes stitching on clothes SO much easier. Definitely check it out!